In former days, to create Magento 2 extension online was quite a challenge to any uninitiated people. But this task has become easier than ever, thanks to step-by-step tutorials.
In fact, online entrepreneurs always seek the most effective solutions and methods to develop extensions with a view to enhancing website performance and boosting sales. If you can create extensions meeting their needs, you can earn tons of profits.
The article will detail what is needed for Magento extension developments and steps to create Magento 2 extension online with ease. Let’s begin!
Needed Resources To Develop Magento Extensions
*Note: All the codes used in the sample are provided by BSS Commerce.
#1. Hardware
- CPU: The Intel 8th Gen Core i3 is highly recommended as a vast number of resources are needed in the process of debugging.
- Hard drive: 120Gb SSD is the best option to keep the data safe, to ensure stability and durability, and to make the process of deploying the code of Magento 2 faster.
- RAM: An 8-Gb RAM is enough, but a 12-16-Gb one comes highly recommended. When developing Magento 2 extensions, we’ll open many tabs at one time and emulate BrowserStack, especially if using the Integrated Programming Environment.
- Display: Full HD (1920×1080 pixels) is encouraged to be used. It’s better to have more than one screen.
#2. Software
- Text Editor: We should utilize the PHPStorm IDE to control the code source and to make use of the utility.
- Composer: Created based on PHP code, Magento 2 Composer is made familiarized with the programmer to monitor the projects’ components. Install here.
- Git: Used during the Magento 2 creation process, Git helps manage codes, monitor changes, recognize and fix bugs, and update without interruption.
- Xampp: Beginners use this software to host PHP with ease.
- Magento 2 Platform: It’s better off installing the latest version. Please go through it in advance and note down sections that need enhancing with extensions.
Create Magento 2 Extension Online With 5 Minimalist Steps
We take the Magento 2 Hello World extension as an example to make the instruction easier to follow.
#Step 1: Create A Folder
In order to save source codes, create a code folder in the root one of Magento 2 in the form: /app/code/[Provider Name]/[Module Name]. For instance: app/code/Bss/HelloWorld.
#Step 2: Declare The Extension By Module XML
<?<?xml version="1.0"?>

<configxmlns:xsi="http://www.w3.org/2001/XMLSchema-instance" xsi:noNamespaceSchemaLocation="urn:magento:framework:Module/etc/module.xsd">
    <module name="Bss_HelloWorld" setup_version="1.0.0">
    </module>
</config>
Insert the code as above at the following app/code/Bss/HelloWorld/etc/module.xml, in the module.xml file.
<?><?php
\Magento\Framework\Component\ComponentRegistrar::register(
    \Magento\Framework\Component\ComponentRegistrar::MODULE,
    'Bss_HelloWorld',
    __DIR__
);
Generate a file in app/code/Bss/HelloWorld/registration.php using the code: Remember to register the created Magento 2 module. Magento can scan and automatically identify the registered module.
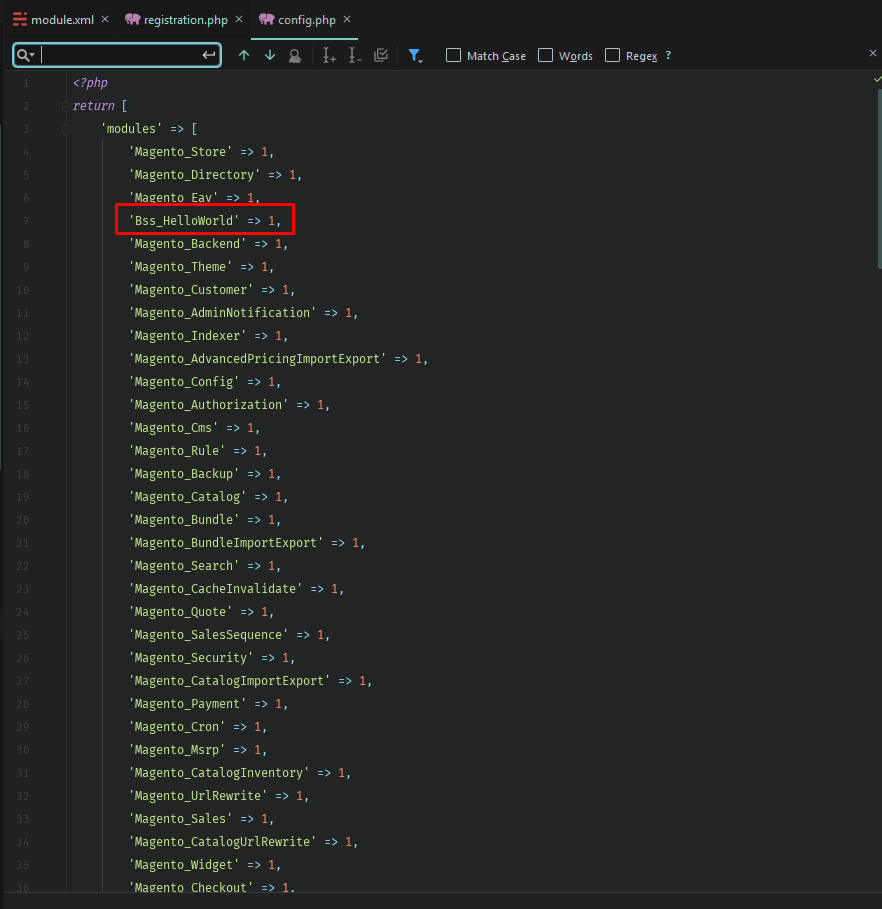
In the root folder of Magento, open the Terminal window or Window PowerShell; then enter the command: php bin/magento setup: upgrade to test the result.
#Step 3: Create A Controller
<?<?xml version="1.0"?>

<config xmlns:xsi="http://www.w3.org/2001/XMLSchema-instance"
        xsi:noNamespaceSchemaLocation="urn:magento:framework:App/etc/routes.xsd">
    <router id="standard">
        <route id="helloworld" frontName="helloworld">
            <module name="Bss_HelloWorld" />
        </route>
    </router>
</config>
Use the code as above to determine the router in the app/code/Bss/HelloWorld/etc/frontend/routes.xml.
<?<?php

namespace Bss\HelloWorld\Controller\Index;

use Magento\Framework\App\Action\Context;

class Index extends \Magento\Framework\App\Action\Action
{
    /**
     * @var \Magento\Framework\View\Result\PageFactory
     */    protected $_resultPageFactory;

    /**
     * Index constructor.
     * @param Context $context
     * @param \Magento\Framework\View\Result\PageFactory $resultPageFactory
     */    public function __construct(Context $context, \Magento\Framework\View\Result\PageFactory $resultPageFactory)
    {
        $this->_resultPageFactory = $resultPageFactory;
        parent::__construct($context);
    }

    /**
     * @return \Magento\Framework\App\ResponseInterface|\Magento\Framework\Controller\ResultInterface
     * |\Magento\Framework\View\Result\Page
     */    public function execute()
    {
        $resultPage = $this->_resultPageFactory->create();
        return $resultPage;
    }
}
Next, use the code as above to generate an Index.php controller file in the app/code/Bss/HelloWorld/Controller/Index/Index.php.
#Step 4: Create A Block
For our sample, the final controller link will be helloworld/index/index. The Model – View – Controller model is in use to store data thanks to block. A block can be created in two simple steps.
<?<?php
namespace Bss\HelloWorld\Block;

class HelloWorld extends \Magento\Framework\View\Element\Template
{
    /**
     * @var \Magento\Framework\App\Config\ScopeConfigInterface
     */    protected $scopeConfig;

    /**
     * Helloworld constructor.
     * @param \Magento\Framework\View\Element\Template\Context $context
     * @param \Magento\Framework\App\Config\ScopeConfigInterface $scopeConfig
     */    public function __construct(
        \Magento\Framework\View\Element\Template\Context $context,
        \Magento\Framework\App\Config\ScopeConfigInterface $scopeConfig
    ) {
        parent::__construct(
            $context
        );
        $this->scopeConfig = $scopeConfig;
    }

    /**
     * @return mixed|string
     */    public function getHelloWorldTxt()
    {
        $text = $this->getText();
        if (!isset($text)) {
            $text = 'Hello World';
        } else {
            $text = 'Hello '.$text;
        }
        return $text;
    }

    /**
     * @return mixed
     */    public function getText()
    {
        return $this->scopeConfig
            ->getValue('helloworld/general/text_content',    \Magento\Store\Model\ScopeInterface::SCOPE_STORE);
    }
}
Firstly, create a file in the app/code/Bss/HelloWorld/Block/HelloWorld.php; then insert the code.
<?<config xmlns:xsi="http://www.w3.org/2001/XMLSchema-instance" xsi:noNamespaceSchemaLocation="urn:magento:module:Magento_Config:etc/system_file.xsd">
    <system>
        <tab id="bss" translate="label" sortOrder="300">
            <label><![CDATA[Bss Commerce]]></label>
        </tab>
        <section id="helloworld" translate="label" sortOrder="130" showInDefault="1" showInWebsite="1" showInStore="1">
            <class>separator-top</class>
            <label>Bss Hello World Setting</label>
            <tab>bss</tab>
            <resource>Bss_HelloWorld::helloworld_config</resource>
            <group id="general" translate="label" type="text" sortOrder="10" showInDefault="1" showInWebsite="1" showInStore="1">
                <field id="text_content" translate="label comment" type="text" showInDefault="1" showInWebsite="1" showInStore="1" >
                    <label>Content goes here</label>
                </field>
            </group>
        </section>
    </system>
</config>
Next, in the admin, generate a file in the app/code/Bss/HelloWorld/etc/adminhtml/system.xml <?xml version=“1.0”?> to create a data environment.
#Step 5:
<?<?xml version="1.0"?>

<?xml version="1.0"?>

<page xmlns:xsi="http://www.w3.org/2001/XMLSchema-instance"
      xsi:noNamespaceSchemaLocation="urn:magento:framework:View/Layout/etc/page_configuration.xsd"
      layout="1column">
    <body>
        <referenceContainer name="content">
            <block class="Bss\HelloWorld\Block\HelloWorld" name="helloworld" template="helloworld.phtml" />
        </referenceContainer>
    </body>
</page>
In the app/code/Bss/HelloWorld/view/frontend/layout/helloworld_index_index.xml, create a layout file.
<?<?php
/**
 * Product list template
 *
 * @var $block \Bss\HelloWorld\Block\Helloworld
 */?>
<h1><?php echo $block->getHelloWorldTxt(); ?></h1>
Next, in the app/code/Bss/HelloWorld/view/frontend/templates/helloworld.phtm, utilize the code as above to generate a file. You’ll notice that a created block is declared with a set template, which is to showcase the data of the next block.
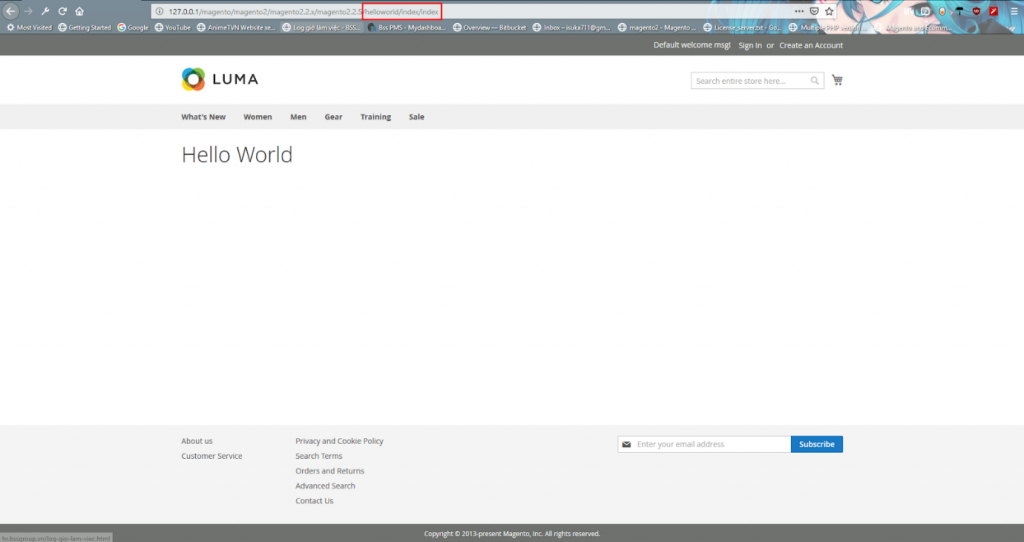
This variable is referencing our block class, so-called the method getHelloWorldTxt(). In the frontend, you’ll have the result as above.
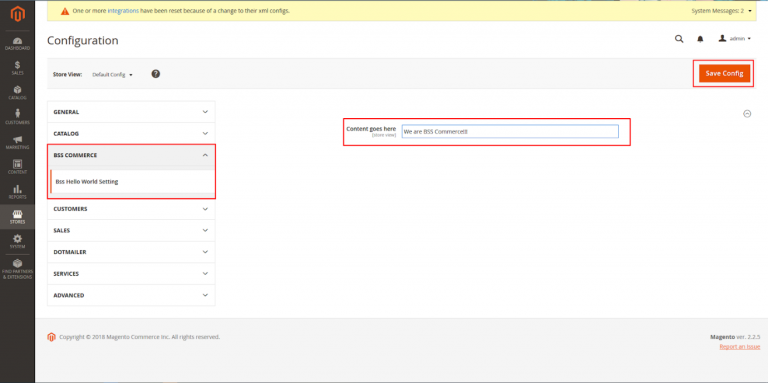
In the Admin, go to Store > Configuration > BSS Commerce > BSS Hello World Setting. A data field has been declared in the system.xml.
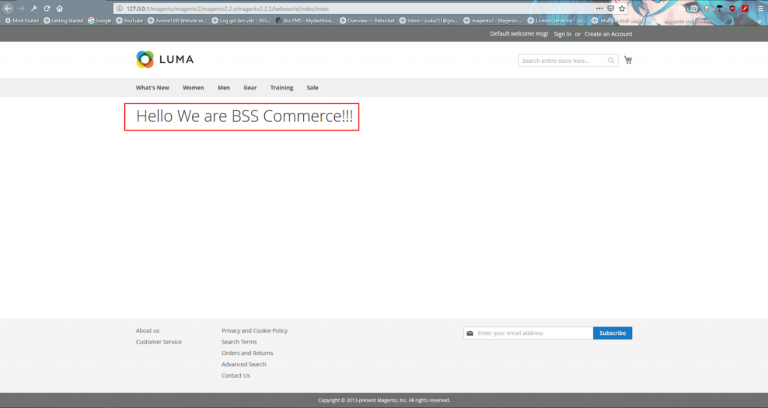
You can enter new input, save and flush a Magento cache to get a similar result.
Wrapping Up
Before you create Magento 2 extension online, you have to be well prepared with all the things, namely computer hardware and software. Good preparation makes your process go smoothly.
The detailed instruction must fulfill your needs for information that is how to create Magento extension online. We’re so pleased to hear from you. In the comment section below, let us know whether or not there are extension issues that need explaining.
When waiting for our answers to your questions, find out more about Magento extensions here. Many thanks for reading!
Read more: